Ginzzzu’s Stickers is a system-independent module for Foundry Virtual Tabletop 14 that turns Journal pages into interactive sticky notes displayed directly in the game interface.
Use stickers to prepare sessions, keep NPC notes, track clues and tasks, organize locations and encounters, attach information to scenes or tokens, and reveal either the entire sticker or only selected parts to players.
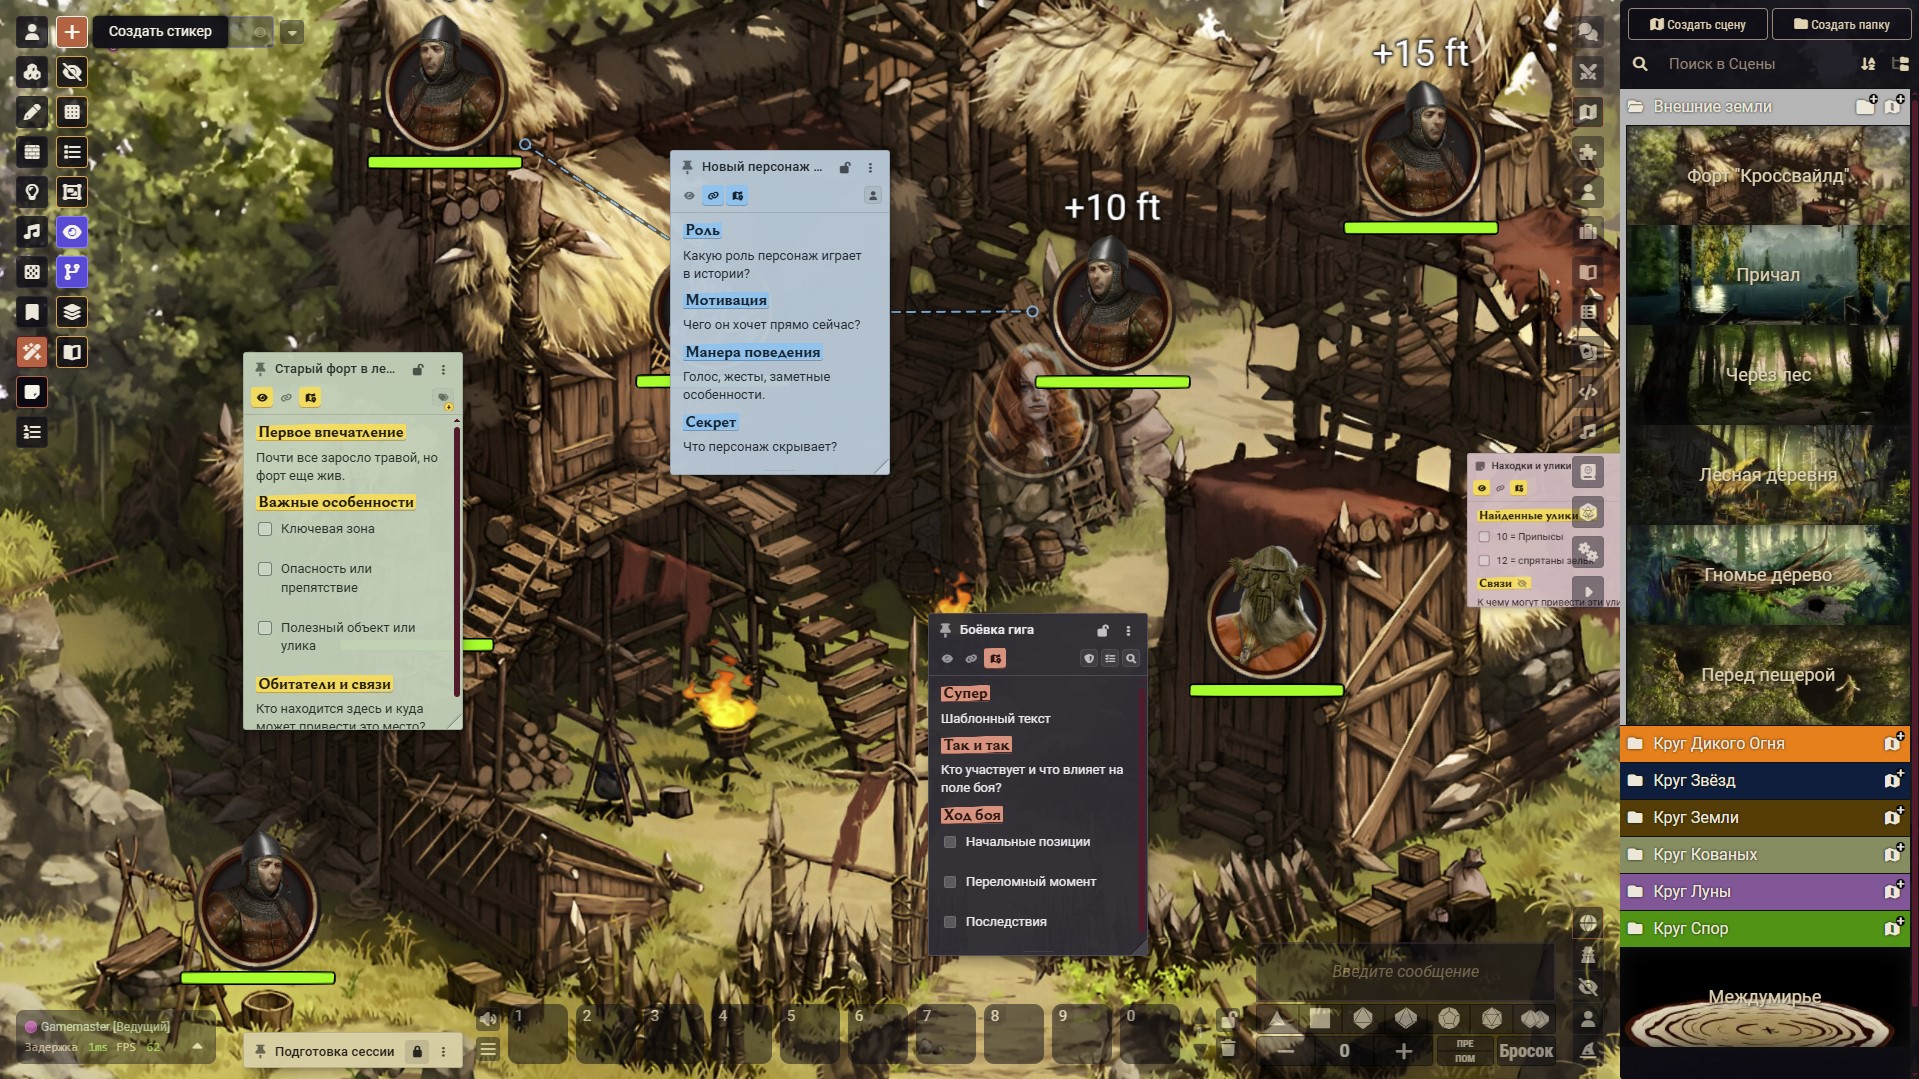
Highlights
Create and organize stickers
- Create a blank sticker or start from a built-in template:
- Location
- NPC
- Combat
- Session Prep
- Blank Sticker
- Scene Plan
- Clues
- Tasks
- Important
- Edit the title and content directly on the sticker.
- Save with
Ctrl+S, the confirmation button, or by clicking outside the editor. - Change sticker color, bold-text marker color, text size, width, and height.
- Switch between Standard (full header) and Compact (minimal header) view modes.
- Add checklists and Foundry document links.
- Assign up to five semantic labels to a sticker.
- Collapse, lock, duplicate, hide, restore, or delete stickers.
Compact view (Minimal UI)
For DM-only reference images, PDF cutouts, or stickers that should occupy minimal screen space:
- Slim single-row header: In idle state, the header is reduced to a slim ~28px bar showing only the placement toggle, title, lock, and menu.
- Hover-revealed quick actions: Hovering over or focusing on the header smoothly expands the quick-action row (player sharing, scene assignments, token links, and label markers).
- Optimized for images and cutouts: Supports smaller dimensions down to 160 × 48 px with tighter content padding and responsive image scaling (
max-width: 100%). - Global and per-sticker control: Set the world default in module settings (Sticker Header Style: Default) or toggle between Standard and Compact view on any individual sticker via its three-dot menu (Header View).
Markdown-style typing shortcuts
While editing a sticker, common Markdown markers typed at the start of a line are converted immediately into the existing rich-text format:
#,##,###,####→ headings;-or*→ bulleted list;1.→ numbered list;>→ block quote;- [ ]→ interactive checklist item;- [x]→ checked interactive checklist item.
The module still stores normal HTML rather than Markdown, so these shortcuts work with partial sharing, Foundry document links, checklists, templates, and the existing autosave system.
Type - [ ] or - [x] normally: - first starts a bullet item, and completing [ ] or [x] immediately promotes that item to the interactive checklist format.
Custom sticker templates
The GM can create reusable templates from any finished sticker:
- Open the sticker’s three-dot menu and choose Save as Template.
- Enter a separate template name. The sticker title itself is also preserved for stickers created from that template.
- Saving under the name of an existing custom template offers to replace its content and appearance after confirmation.
- Built-in templates cannot be overwritten, renamed, or deleted.
- Open Manage Templates from the Stickers controls to:
- change template order by dragging;
- hide templates from the Create Sticker menu;
- rename custom templates;
- delete custom templates after confirmation.
- Deleting a template does not change stickers that were already created from it.
A custom template stores:
- sticker title and content;
- color and marker settings;
- font size;
- header view mode (standard or compact);
- labels and icon;
- width and height.
A template does not store:
- screen or map coordinates;
- scene assignments;
- token or actor bindings;
- sharing state or recipients;
- collapsed, locked, or other temporary workspace state.
Checklist completion is cleared when a template is saved. Every sticker created from any template starts as an On Screen sticker and can be anchored to the map afterward if needed.
Create a sticker by dragging a Journal page
- Drag any Journal page directly onto the game canvas.
- The module creates an independent On Screen sticker at the drop point instead of Foundry's standard scene Note and configuration dialog.
- The copied sticker is stored in the configured sticker Journal and assigned to the current Scene.
- Text pages copy their content, image pages display the image, and PDF, video, or other page types create a link to the original page.
- The original Journal page is never modified and remains in its original Journal.
Screen and map placement
New stickers are created as On Screen stickers assigned to the currently viewed Scene by default. They can later be made global or assigned to other Scenes.
A sticker can be placed in one of two modes:
- On Screen — stays in the interface while the map is panned or zoomed.
- On Map — is anchored to scene coordinates and moves and scales with the canvas.
On Map stickers use the configured map-sticker size when first placed. The GM can then drag the existing folded corner in the lower-right to resize each sticker manually. The custom width and height are saved separately for each Scene and continue to scale with the canvas.
Use the placement icon before the sticker title to switch between the two modes.
Map stickers remain above the game canvas but below Foundry’s right sidebar and other interface panels. Screen stickers remain interface overlays.
Scene assignment
- Show a sticker on every scene or only on selected scenes.
- Search scenes by name.
- Browse scenes grouped by Foundry folders.
- Map stickers store a separate position for each assigned scene.
Sticker catalog and workspace tools
- Open a searchable catalog of all stickers.
- Filter by scene assignment, label, placement type, visibility, collapsed state, or token binding.
- Focus a sticker from the catalog without rebuilding the rest of the workspace.
- Automatically arrange visible unlocked stickers as:
- grid;
- cascade;
- left or right columns;
- collapsed row along the top or bottom edge.
- Select and move several stickers as a group.
- Bring off-screen stickers back into the visible workspace.
Sharing with players
- Share a sticker with every player or only selected recipients.
- Send a separate read-only copy without granting access to the service Journal.
- Share:
- the full sticker; or
- only selected sections and checklist items.
- Reveal or hide sections directly from the GM sticker while sharing is active in partial mode.
- Hidden content is filtered before it is sent to players.
- Players may collapse or locally dismiss a shared sticker.
- The GM can show it again or remove it from all recipients.
The eye button in the quick-action row opens sharing settings. Right-clicking an active eye removes the sticker from players after confirmation.
Token and actor bindings
A sticker can be linked to specific tokens or to an actor, including future tokens created from that actor.
Available binding modes:
- Link only — keeps the relation without changing sticker visibility.
- Token present — shows the sticker while a linked token is present on the scene.
- GM selected — shows the sticker when the GM selects a linked token.
- Player clicked — shows an authorized shared sticker when a player clicks a linked token.
Additional tools include:
- drag a token or actor onto the chain button to open binding settings;
- add controlled tokens;
- jump to a linked token;
- show connector lines never, on hover, or always;
- display a ring at the linked token;
- follow an off-screen arrow to the token.
The chain button opens binding settings. Right-clicking an active chain removes all bindings after confirmation.
First-time setup
- Enable the module in your world.
- Open Game Settings → Configure Settings → Module Settings.
- Open Ginzzzu’s Stickers → Sticker Journal.
- Select an existing Journal or create a dedicated service Journal.
- Choose how new and existing sticker pages should be organized.
Ordinary pages in the selected Journal are not modified. The module manages only pages marked as stickers, template pages, and its own service section pages.
Service Journal and template storage
- Sticker pages can be organized into service sections according to their labels.
- Built-in and custom templates are stored as separate Journal pages under the dedicated Templates section.
- Template pages are not shown as normal stickers and are never sent to players.
- When existing stickers are moved to another Journal through the module settings, only sticker pages are moved. Template pages remain in their original service Journal, and the module continues using that Journal as template storage.
- Do not delete the Journal that stores templates unless those templates are no longer needed.
Quick start
Create and use a sticker
- Select Stickers in the scene controls.
- Click Create Sticker and choose a visible template.
- Double-click the title or content to edit.
- Use the quick-action row:
- placement icon — switch between screen and map placement;
- eye — configure player sharing;
- chain — configure token or actor bindings;
- scene icon — assign scenes;
- label icons — add or remove labels.
- Open the three-dot menu for appearance, checklist, Journal, duplication, template, visibility, and deletion commands.
- Use Sticker List to search and manage the whole collection.
- Use Automatic Layout to clean up the current workspace.
Create and manage a custom template
- Prepare and format an ordinary sticker.
- Open its three-dot menu and choose Save as Template.
- Enter the template name and confirm.
- Open Manage Templates to reorder it, hide it from the creation menu, rename it, or delete it.
- Create a new sticker from the template. It appears as an On Screen sticker and can then be anchored to the map manually.
GM and player access
Game Master
The GM can create and edit stickers, create and manage templates, assign scenes, configure bindings, share content, control partial visibility, and organize the sticker Journal.
Players
Players cannot create stickers or manage templates. They receive only read-only copies explicitly shared with them. They can collapse a sticker, interact with visible checklist items, or hide the copy locally. They do not receive access to hidden sections, unrelated GM notes, templates, or the service Journal.
Compatibility
- Foundry Virtual Tabletop: 14
- Game systems: system-independent
- External dependencies: none
- Languages:
- English
- Russian