Overview
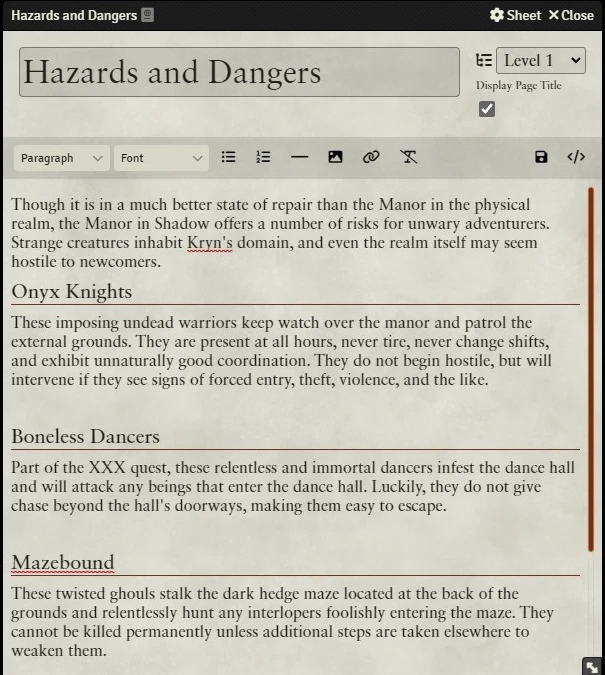
Journal Entries provide a method for GMs to organize and maintain hand-outs for their players by providing separate and individual 'pages' which can be displayed individually to users. Journal Entry Pages are edited using a rich text editor (with raw HTML support gated behind a convenient 'source' button in the editor).
This article will familiarize you with creating and editing journal entries, changing their views, adjusting their permission levels, and creating dynamic links to documents.
Using Journal Entries
When thinking about Journal entries, it is best to imagine each entry as a small subset of a larger piece of information. As Folders store Documents (including Journal Entries), Journal Entries store Pages, with each one acting as a separate unit of related information. Journal Entry Pages can be one of a variety of types:
- Text
- Text pages are the most common type of Journal Entry Page, and are used to store and display text-based information. Editing Text pages is done primarily using a rich text editor, with support for editing the raw HTML available for power users.
- Image
- Image pages are used to provide specific image hand-outs, allowing you to showcase a particular picture in a way that can be shown to one or more players in a convenient way. Image pages can be uploaded and stored in the Foundry VTT user data folder, or linked to an external image URL (if the host of the remote image supports external linking).
- Video
- Video pages can be used to play a specific video for one or more users. Video files can be uploaded from your computer, or pages can instead link to an external video URL. Popular streaming services such as YouTube are supported by default.
- PDF pages allow for displaying wholly separate PDF documents. PDF documents can be uploaded from your computer, or linked to an external PDF URL. A word of caution, however: PDF Pages were not designed with form-fillable PDFs in mind and attempting to use and edit PDF forms may have undesired or unpredictable results.
Creating a new Journal Entry is simple and requires only a few button presses:
- Navigate to the Journal Sidebar tab ( ).
- Click the Create Journal Entry button in the top right corner of the Journal Directory.
- Enter a name for your Journal Entry in the dialog that appears.
- Click the Create New Journal Entry button to create your Journal Entry.
Once created, your new Journal Entry will open, allowing you to add pages, change the Journal Entry's name, or show the entry to others.
Once you have created a Journal Entry, you can create pages of any of the above types within that entry. Pages are designed to be used to break your content up into logical and easy to use sections. To create a page:
- From within an open Journal Entry, click the Add Page button.
- In the dialog that appears, name your Page
- Choose the type of page you wish to create from the dropdown menu.
- Click the Create New Page button.
Once created, your new page will open in an editing mode, allowing you to edit the content or define links and settings for that Page as required.
Additional Journal Entry Features
Journal Entries also support a few key features which are useful to be aware of:
Map Notes
Journal Entries and their Pages can be 'pinned' to any Scene, generating a Map Note that will display the associated page or whole entry when clicked.
For a greater explanation of this feature, and how it can be used, please refer to Map Notes.
Multipage View
Journal Entries support displaying all the pages the Entry may contain in a single view for convenient ease of reading across multiple pages of varying types. To toggle this view, simply click in the Journal Entry sidebar and the display will switch between multi-page viewing and single-page viewing.
Showing Journal Entries and Pages to Players
Journal entries and their pages may be shown to specific players, or all players. If you wish to show a page to one or more players, simply click "Show Players" from the heading menu for any Journal Entry. By default, show players assumes you wish to show all players the journal entry, but you can selectively choose individual players who will receive it. Once you have selected the players to show, clicking the button Show Players will confirm and display that page for the players you selected, bringing it to the forefront of their screen. If you are in Multipage view, you can show individual pages by right-clicking the specific page in the Journal Sidebar and choosing "Show Players" instead.
The Page Editor

Text Pages have a variety of options for editing which can be configured by clicking Sheet in the editor window. This will provide you with a dialog allowing you to toggle between any of the following editor options:
- Default Text Page Sheet
- The default editor uses Prosemirror, a versatile editor which provides a robust visual editing experience while also providing features like collaborative editing and auto-saving of entries.
- Markdown
- For those familiar with Markdown, the Markdown editing sheet provides access to use shorthand codes compatible with Markdown, such as using # to denote header and ** to denote bold.
- TinyMCE
- The previous editor used under Version 9 of Foundry VTT. While this editor is still supported, it is being phased out and should no longer be relied on.
Journal entries offer two specific controls which affect how they are displayed to users. The upper right side of every page editor provides a toggle for whether or not title of that page will be displayed in the single-page view of a Journal Entry. Additionally, the Level dropdown configures how much the page is indented in the table of contents listing of the Journal Sidebar
Text Page Features
Text Pages support a variety of features many users have come to expect from the average text editor, including formatting options for headers, bold, italic, underline, strikethrough, and more. There are also some special features supported by Foundry VTT:
Collaborative Editing
The Prosemirror text editor provides ability for multiple users to edit the same Text Page at the same time. Changes made by all users will be updated in realtime for other users within the same Page, and any one user issuing a save command saves the current work of all users.
Automatic Saving
Journal entry pages automatically save on a timed interval (every 60 seconds by default). The rate at which data is automatically saved can be adjusted within the settings menu, accessible by clicking Configure Settings from the Settings sidebar tab.
Secret Text
Foundry VTT adds a custom formatting called Secret to text entries which will only be visible to the GM or Owner of the Journal Entry. You can create a Secret by selecting "Block" and then "Secret" from the Paragraph formatting menu. If text is selected when you choose 'secret' it will change the selected text to Secret. Secret text blocks can be toggled as visible to players by clicking the 'reveal' button, allowing players to see the content of the text if they are presently viewing the Page.
Journal Source Code
In addition to the formatting options available through Prosemirror, using the "Source HTML" option from the formatting menu will allow you to edit the HTML of a Page directly, opening access to HTML tags and a vast array of custom styling.
Linking Documents
The Page Editor allows you to link to other types of Documents in the rich text editor. For more information on this, consult the Dynamic Document Links section later in this article.
Tables
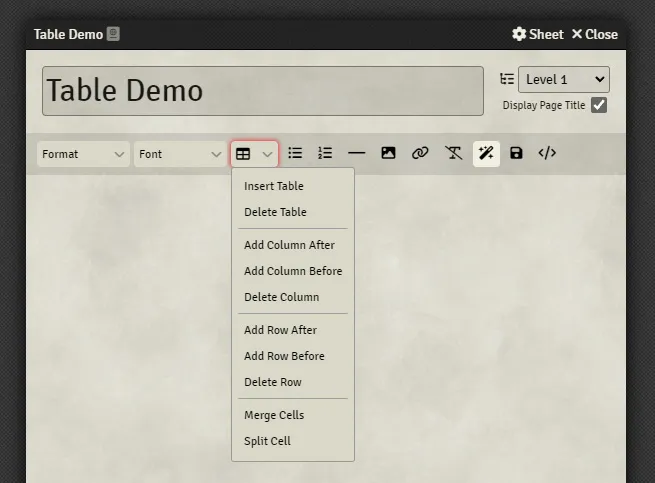
When using ProseMirror it's possible to add and edit tables by pressing the icon and choosing an option from the dropdown:
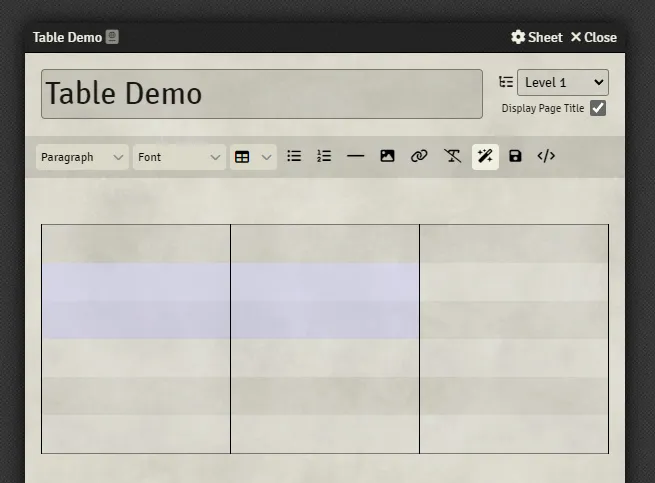
- Insert Table
- Prompts you to select how many columns and rows your table should have and then creates your table.
- Delete Table
- Deletes the selected Table.
- Add Column After
- Adds a new column to the right of the currently selected column.
- Add Column Before
- Adds a new column to the left of the currently selected column.
- Delete Column
- Deletes the currently selected column and any content within it.
- Add Row After
- Adds a row below the currently selected row.
- Add Row Before
- Adds a row above the currently selected row.
- Delete Row
- Deletes the currently selected row and any content within it.
- Merge Cells
- Takes all of the selected cells and merges them into one cell.
- Split Cell
- If cells have been merged this option will return them to their original state.
Keybindings
If you are using macOS, any reference to Ctrl in this document should be assumed to mean Command.
-
Bold
CTRL + B -
Italics
CTRL + I -
Underline
CTRL + U -
Code
CTRL + ` -
Bulleted List
CTRL + SHIFT + 8 -
Ordered List
CTRL + SHIFT + 9 -
Indent List Item
Tab -
Unindent List Item
SHIFT + Tab -
Blockquote
CTRL + SHIFT + > -
Horizontal Rule
CTRL + SHIFT + _ -
Headings 1-6
CTRL + SHIFT + 1-6 -
Undo
CTRL + Z -
Redo
CTRL + SHIFT + Z
Journal Context Menu Options
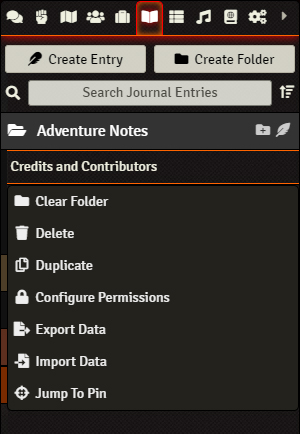
You can right click any journal entry in the journals directory to open the context menu. This menu provides a list of useful actions that allow you to manipulate the chosen entry in various ways.
- Clear Folder
- Removes the Journal Entry from all folders, placing it at the top level of the Journal Entries directory.
- Delete
- Deletes the Journal Entry, after accepting a confirmation prompt.
- Duplicate
- Creates a copy of the Journal Entry in the directory.
- Configure Permission
- Configure the permission levels of the Journal Entry, allowing players of your choice to view or modify the Journal Entry in the directory.
- Export Data
- Exports the Journal Entry's data as a JSON file on your computer.
- Import Data
- Imports data into the Journal Entry from a JSON file on your computer.
Journal Permission Levels
As with all other Documents, Journal Entries have levels of Permissions that when assigned allow them to view and edit those entries at differing levels. The levels of permission are:
- None (default for non-creator)
- The user has no permission to view or edit a Journal Entry by default.
- Limited
- The user may see the map pin for this Journal Entry but will not see it in the sidebar. Double-clicking the map note pin will allow the Journal Entry Image to be displayed, but not the text.
- Observer
- The user may see the map pin for this Journal Entry as well as the Journal Entry in the sidebar, and may open the actual journal by clicking on the pin or its entry in the sidebar. In addition, the user may toggle between Image view and Text view for that journal entry.
- Owner (default for creator)
- The user may see the map pin and sidebar entry for this journal, and when the window is open may edit and change any features of that Journal Entry.
Dynamic Document Links
Though not exclusive to Journal Entries, Foundry VTT supports linking to other types of Documents from within its rich text editor system. Actors, Items, Journal Entries, and Rollable Tables and more may be linked to dynamically by dragging and dropping a document from the sidebar into an open editor. If you have text selected when dropping your document into the editor, the selected text will be used as the label for the link.
In addition to creating dymanic links by dragging and dropping content into an open editor, it is possible to create a manual link to a specific document if you know the ID or the name of the document. Wherever possible, it is best to use the ID of a document rather than the name, as the ID is a more reliable point of reference.
Getting the ID of a document:
- Open a Document (such as an Actor) you wish to reference.
- Click the icon located next to the Document's name in the header bar to copy the ID to your clipboard.
- This ID can now be pasted wherever you like using Ctrl+V (CMD+V for macOS)
The syntax to create a dynamic link is as follows:
@DocumentType[Document Name]
@DocumentType[Document ID]{Custom Text Label}
For example:
@Actor[Locke]
@Actor[Pt1jPTgVWdJ6QYIA]{Locke}
UUIDs
A more robust link can be created by using the UUID format which is commonly used when dragging and dropping entries. The format below can be used, providing even more reliable linking.
@UUID[DocumentType.ID]{Custom Text Label}For example:
@UUID[Actor.VXbvLWzJkGYkMc63]{Akra (Dragonborn Cleric)}This allows a GM to quickly link numerous journal entries to one another and, if the user viewing the Journal Entry has permission to view the linked document, clicking on the link will open the linked document in another window.
Linking to Headers
A specific feature of Journal Entry Pages is the ability to provide a link to a specific header within a journal entry. These links can only be created by dragging and dropping the specific header of a Page from the Journal Entry sidebar into another rich text field. Doing so generates a dynamic link which, when clicked, will automatically open that Journal Entry to the specified header. This feature is particularly useful if you have long journal entries, such as session notes, and wish to link to a specific subsection in a way that will scroll users to view it specifically.
API References
To interact with Journal Entry documents programmatically, you will primarily use the following API concepts: